
2003 Mercury 115HP Four Stroke 115ELPT4S
Remote (Shift and Throttle) Cable Replacement
After 14 years, the remote shift cable broke. Fortunately, it happened when I shifted into reverse at our dock. Here’s how to replace the cables.
The service manual says this procedure applies to 40hp – 125HP Mercury outboards from 2001 – 2005.
After removing the cowling, start by pulling up the rubber seal: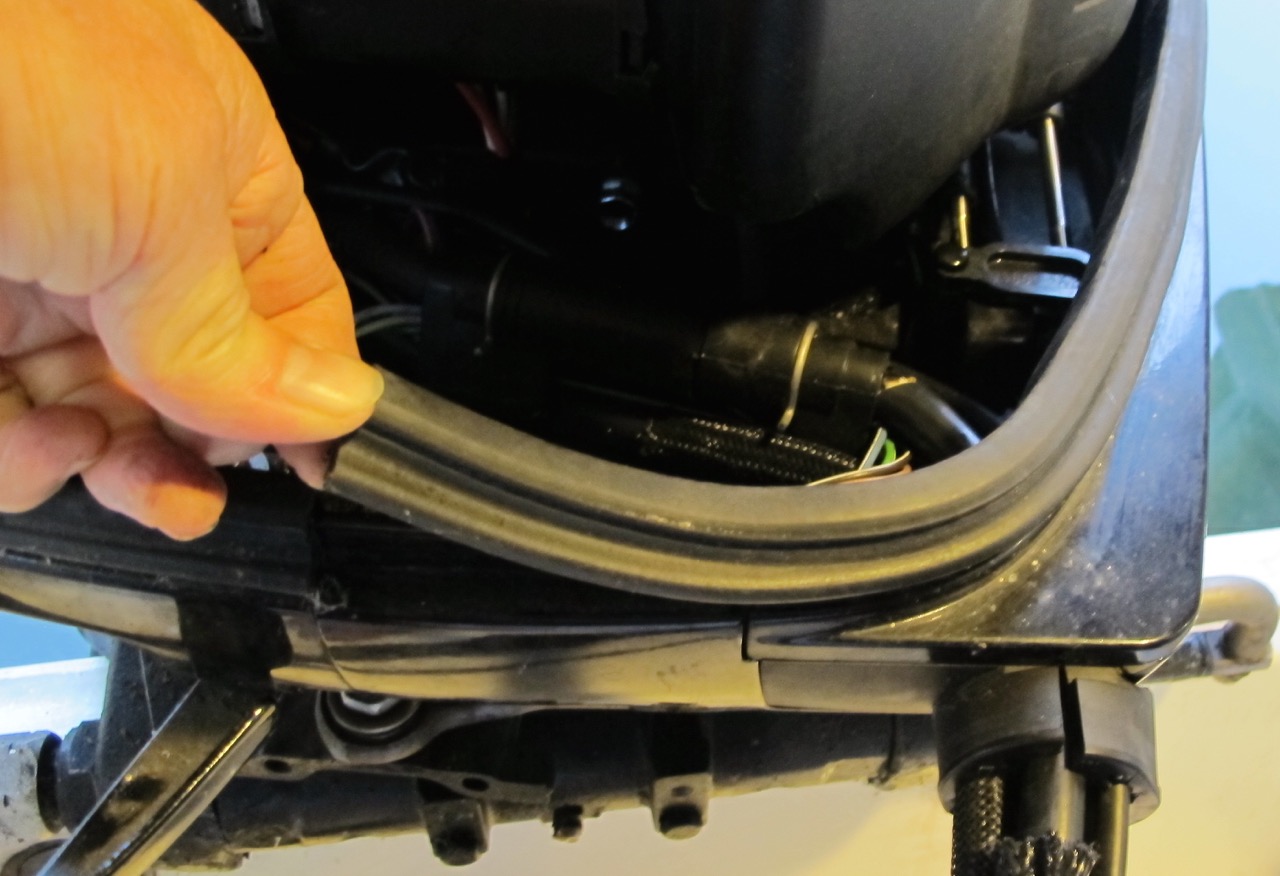
This will expose two 8m bolts that hold in the side access panel: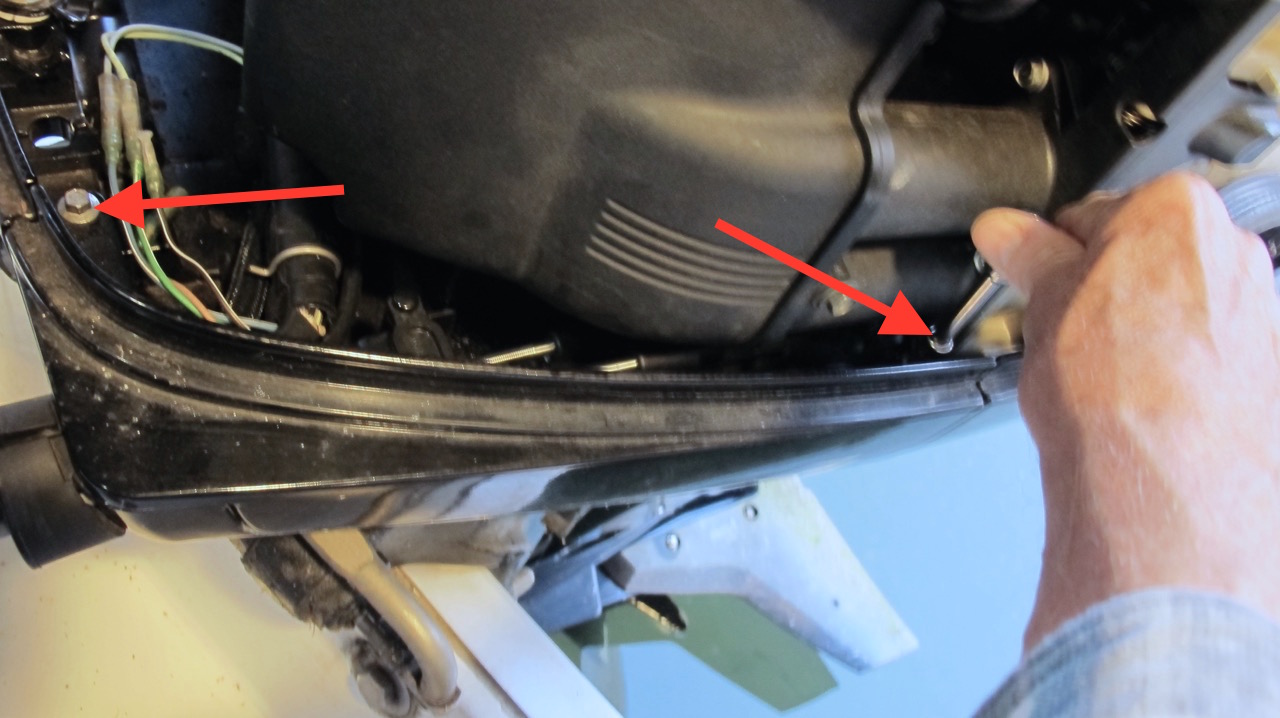
After removing the panel, the remote cables are easily accessible. The throttle cable is on top and the shift cable is on the bottom:
Turn the latch which holds in the adjustment barrels: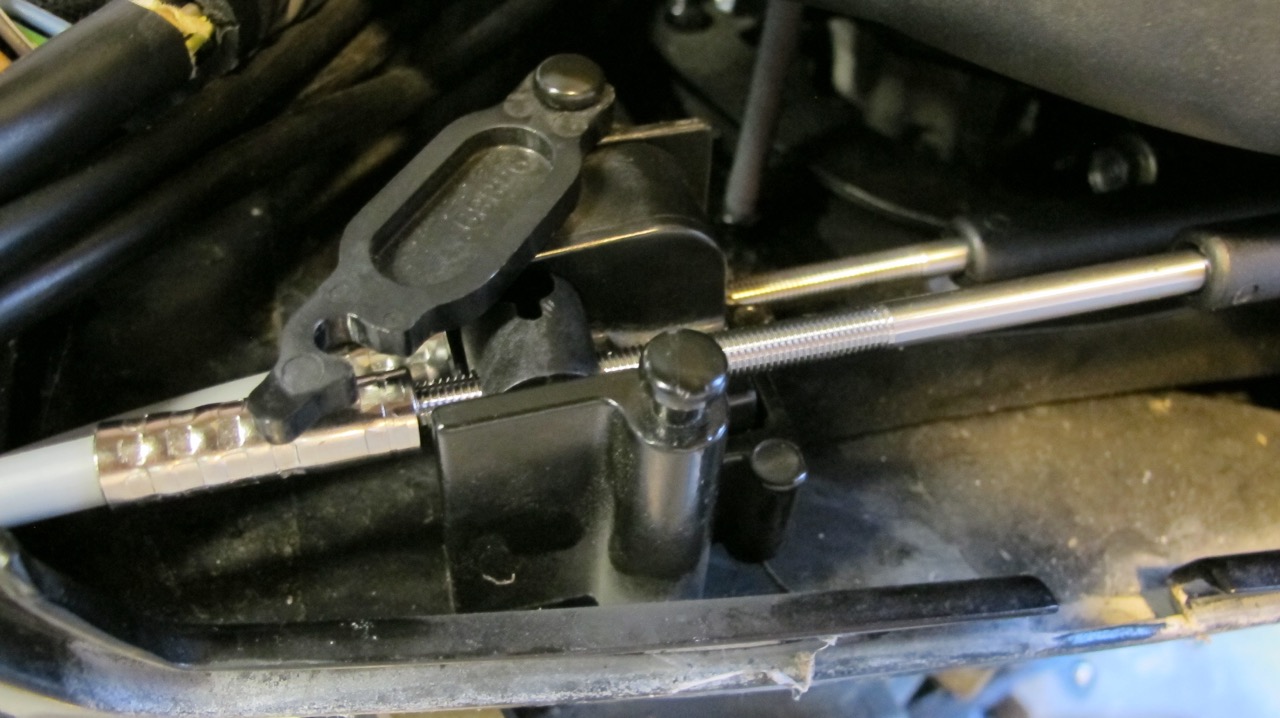
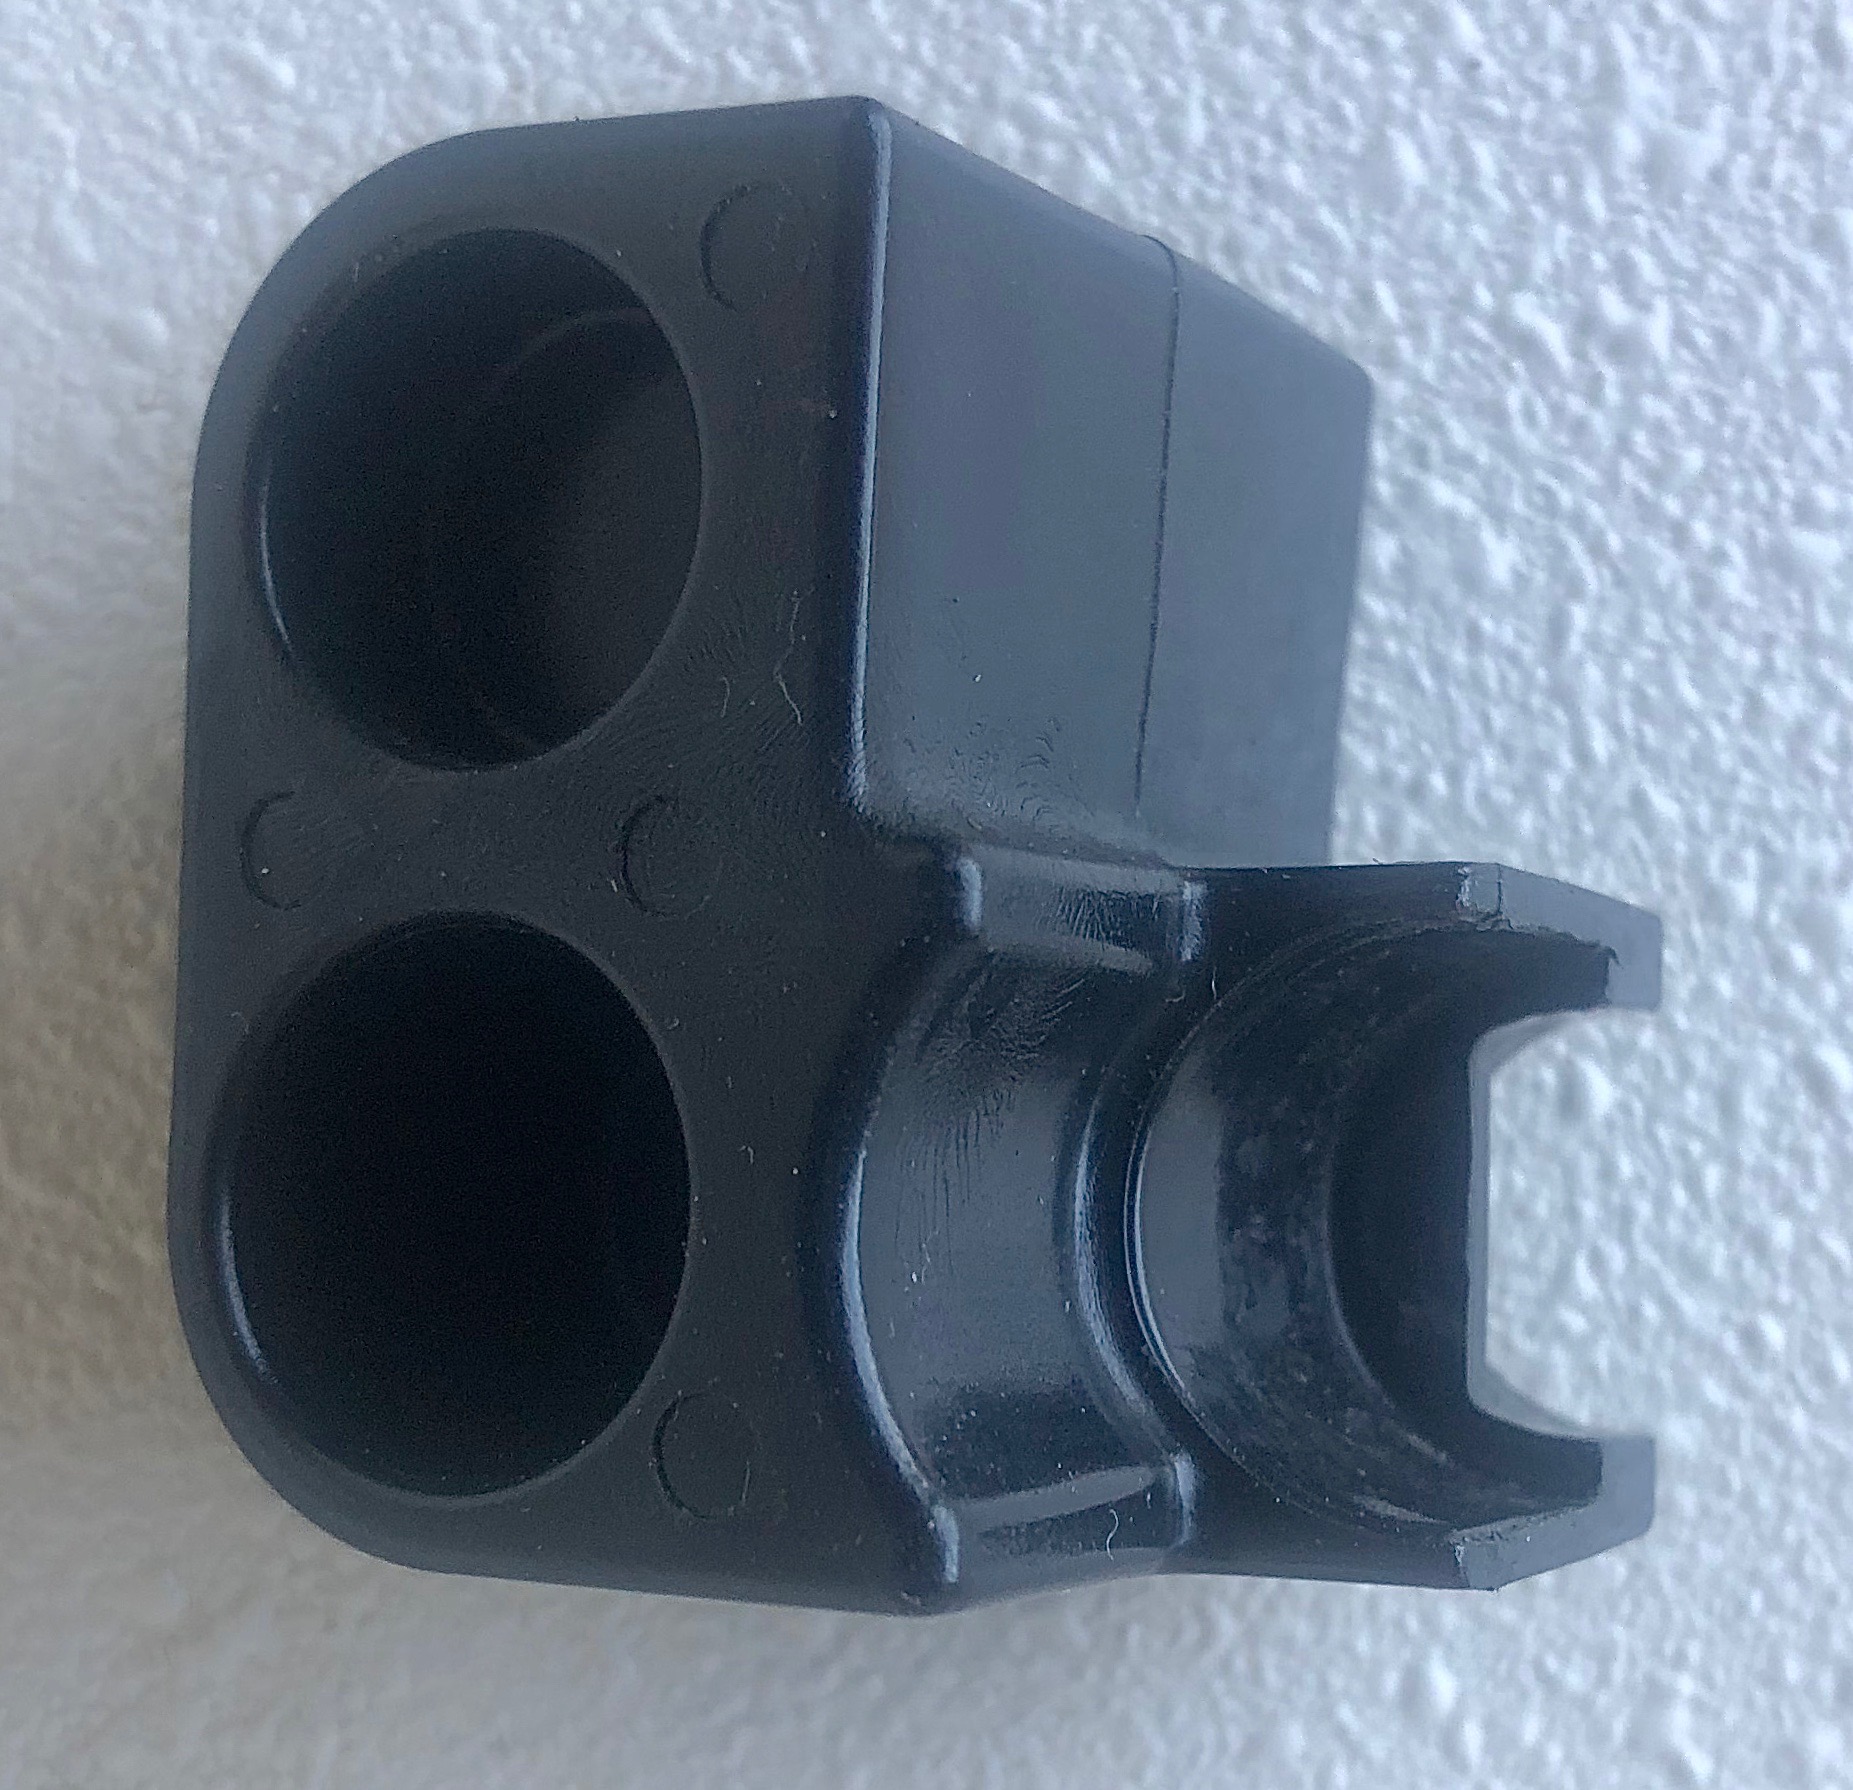
and remove the plastic cup barrel which holds the two shift cable barrels in place:
Remove the “R” pin from the throttle cable: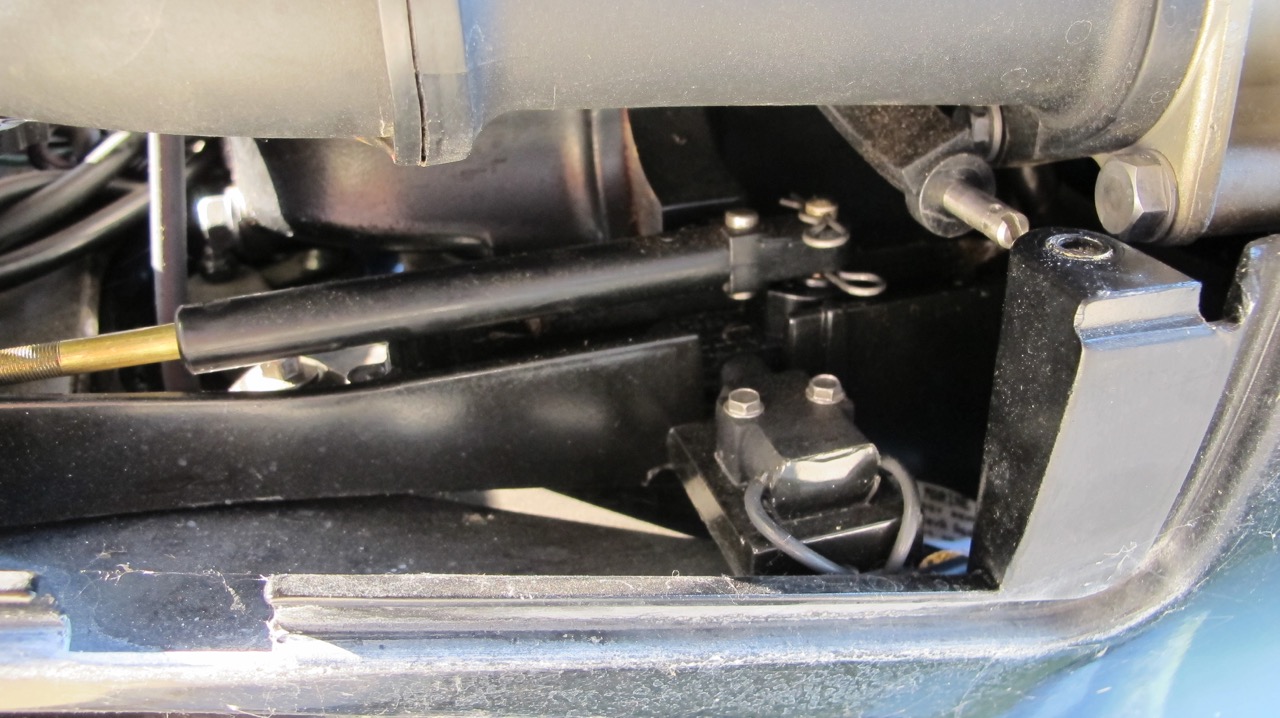
Lift the adjuster barrel up to free the throttle cable: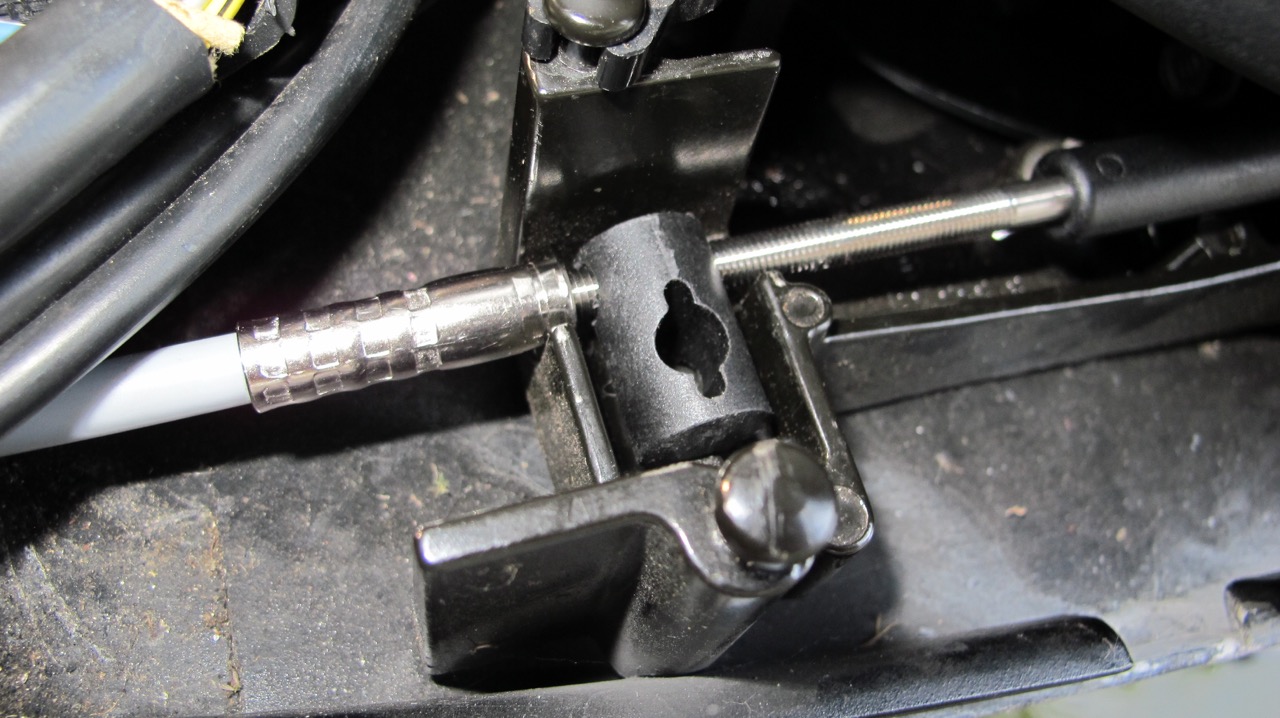
Remove the “R” pin from the shift cable and pull the adjuster barrel up to free the cable:
Here is a view of the cables in the remote control: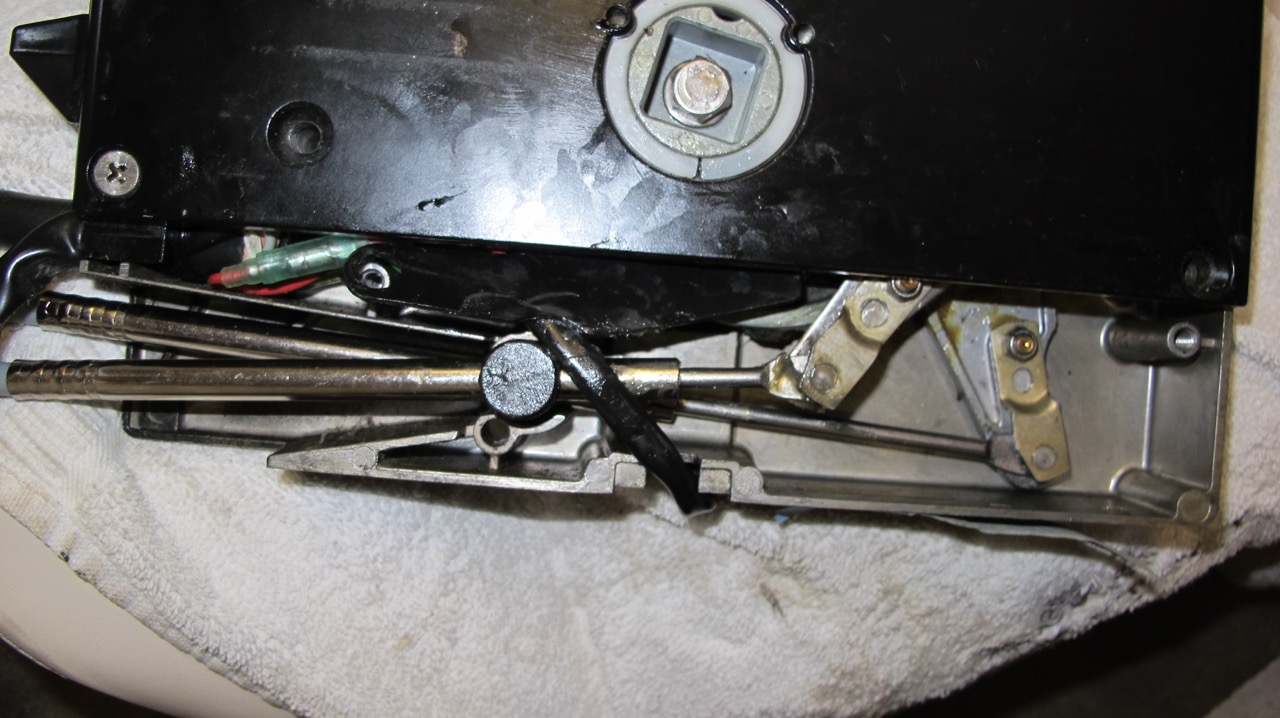
The throttle cable is on top and the shift cable is on the bottom. Push the shift lever forward to access the 6mm nut that holds the throttle cable clip. The shift cable nut and clip can easily be removed in neutral.
This picture shows the electrical cable on top. During re-assembly, I put it below the throttle cable and above the shift cable to give it more space.
Replacement Cables:
My old cables were 12 foot Morse D63732-000 144.0. The Mercury 12 foot cables were a few inches shorter (8M0082485). I ended up buying 13 foot Mercury cables (8M0082486), which allowed for more gradual bends at the stern and into the motor.
Reassembly:
- Connect the new shift and throttle cables to the remote and put the remote lever into neutral.
- On the engine, put the transmission into neutral. You may need need to rotate the propeller when shifting.
- Route the cables below the gas and electrical connections on the motor. Make sure they have a nice radius when the steering is turned all the way right and left.
- Connect the “R” pin of the shift cable and adjust the barrel to fit nicely into its slot in the black plastic cup barrel holder.
- Connect the “R” pin of the throttle cable and adjust the barrel so that the throttle lever is close to the throttle stop position. The service manual says that you should be able to slide a piece of paper between the throttle lever and the throttle stop. But, on my 115HP engine, there’s a plastic panel covering the throttle stop.
- Put the lever that holds down the two barrels back into its lock position.
- Check the throttle/shift lever movement on the remote to make sure they work as expected. Have an assistant rotate the propeller while shifting into forward or reverse.
- Reassemble the access panel, the rubber grommet that holds all the cables and the rubber cowling seal.
- Reassemble and mount the remote control.
You should be good to go at this point. Let me know if I forgot anything.
Updated: June 2019
Contact: GerdHoeren at Gmail dot com